Let’s talk a bit about bird watching without a lot of effort and expense.
During winter and spring, food is scarce for our feathered friends. The temperatures are usually cool enough that many insect populations haven't emerged – bad news for those birds who eat insects. Also, the fruit eating birds won't see their favorite foods naturally appearing until harvest.
Here’s some easy ways to help feed out feathered friends:
- Set a pie tin on a stool or flat topped tree trunk or hang it in a hanging plant hanger. Punch drainage holes in it, and elevate it a little by placing small rocks or twigs beneath it. Fill it with the seed that will attract the birds you want to see – Juncos, Cardinals, Jays, Sparrows for example. The seed is available at most hardware or pet stores. Each bag will list the seed type and what species of birds will eat it.
- Punch a hole through both sides of an empty two-liter plastic pop bottle. Stick a twig all the way through with its ends sticking out for perches. Cut a one inch hole above the twig for the birds to pull the seeds out. Fill the bottle with seed up to the hole. Hang the bottle by tying a string around its neck.
- Coat a pine cone with peanut butter, roll it in birdseed, and hang it from a tree branch.
- Stick a piece of bread, a doughnut, or half of an orange on a branch of a tree. Orioles love the orange!
- The simplest method is to scatter bird seed or bread crumbs on the ground.

Family and friends like to gather around a bonfire and cook hot dogs and marshmallows on a stick. And contrary to popular belief, a bonfire in the winter can be better than the summer. It gets dark earlier so you can enjoy the bonfire longer.
You may think that a winter bonfire is cold, but your winter clothes along with the heat from the bonfire will keep you toasty.
In the winter you can still find wood to burn, and once the fire gets going you can put wood on that has ice on it and watch the ice melt. The best wood with which to start a winter fire is dry pine or cedar.
Of course, one of the greatest advantages of a winter bonfire … NO BUGS. Nothing buzzing in your ears. No waving your hands around your head. No slapping your arms when a mosquito lands.

What freezes faster – hot or cold water? That depends on how you choose to freeze it.
Toss a pot of boiling water into the air on a cold winter day and it freezes in mid-air, creating a shower of ice crystals. This happens because the hot water is so close to being steam, that it breaks up into tiny droplets.
Hot water is less viscous than cold water. The small water droplets have a large surface area which allows for a great deal of evaporation which removes heat quickly. The cooled droplets are so small that they can be easily frozen by the winter air. All of this happens before the water hits the ground.
If you try this with cold water, don’t stand under the water when tossed in the air. Cold water is thicker and stickier so it doesn’t break up into small pieces so it comes down in large blobs. Try it yourself when the temperature outside drops in the single digits and below.

For centuries, humans in cold-weather cultures around the earth searched for ways to bring brightness into the darkness of winter. Countries such as Finland, Norway, Russia, Germany, and China claim that they created the first ice lanterns.
Ice lanterns are easy to make for kids of all ages! It's a perfect activity for everything from a child's birthday party to a grown up get together. The craft of making ice lanterns has varying techniques that create different sizes and shapes.
One way to create cylinder lanterns, is to simply fill an ice cream bucket with cold water and set it outside. Depending on the temperature, check the thickness of the outer ice every couple of hours. Once the thickness reaches one to two inches, run warm water over the bucket to free the cylinder. The easy way to create a chimney is to flip the finished cylinder ice lantern over and use the open bottom as a chimney. For more protection from the wind, drill a hole through the top of the lantern. Light the candle and enjoy.
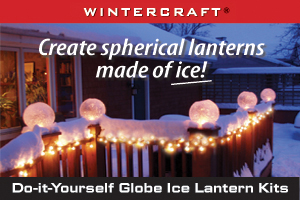
To create a beautiful ice globe, as pictured above, we recommend Wintercraft's ice lantern kit - found at www.wintercraft.com. It comes complete directions, thick balloons (fyi, thin balloons break in cold temps), clips, base, and even submersible LED candles.

All you need is hard snow, a long saw and a shovel to build an igloo in your own backyard. The snow you choose should be dry and hard.
1. Cut large, narrow blocks out of the hard snow about 2 ft. wide, 15 in. high, and 8 in. tall. Or, find a large plastic box, pack snow tightly inside and spray cold water on top once removed.
2. Map out the space for your igloo. Form a circle with the blocks on the ground.
3. With the circle complete, stack the next row on top making sure the seams are off-set. The blocks should have a slight lean inward. Once the row is complete, the inward-leaning blocks will lock themselves into place.
4. At the top, shape the last block to fit the final opening insert from the inside of the igloo.
5. Cut open a doorway and build a half arch so cold air and snow don’t drift in. Fill all of the open holes in the walls with snow.
6. Spray water on top of the igloo at night to make it stronger and longer lasting.
7. The warmth of your body will help keep the inside of your igloo warm. Light a small candle for more heat. Cut a small ventilation hole in the top for any smoke that might accumulate.

It’s a no-brainer that whenever there are enough inches of snow to cover a hillside, you can turn the hill into a sled run for everyone in the neighborhood to enjoy. But what happens if there are plenty of the white fluffy flakes, but no elevation to slide down.
The simple answer is to make a hill of your own. Shoveling is one way, but it’s a lot of back breaking work. The easy way is to use a snowblower. Start out making a circle and blowing the snow to the center. Be sure to begin wide in order to have enough snow to pile in the middle. Repeat with every snowfall and before long, you’ll be scaling mount-backyard.
Add a little interest in the run by carving dips and turns. The base of your backyard mountain is also a good place for jumps and moguls.

Snow painting is a great family winter activity. It is a wonderful way to introduce kids to the joy of artistic expression. If your kids have exceptional artistic talent, they will love the chance to explore a new medium to create their art. And if your kids aren't especially artistic, well, they’ll still have fun.
Snow painting is simple and requires very little preparation:
1. Gather Necessary Items
Yellow, red, and blue food coloring, spray bottles for each color, plastic bowls, and brushes.
2. Fill the spray bottles and bowls with cold water with a few drops of food coloring. Be sure that the water has enough coloring so the colors are visible once they are sprayed or brushed on the snow.
3. Go out and paint the snow.
4. Don’t forget to take pictures of the masterpieces.


